How to Make a Two-Part Mold with Silicone Plastique®
Step 1
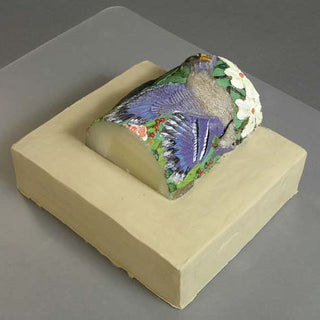
A parting line represents where on a model, the two halves of the two part mold will separate and come together. The parting line in this example runs directly down the middle of our model.
Step 2
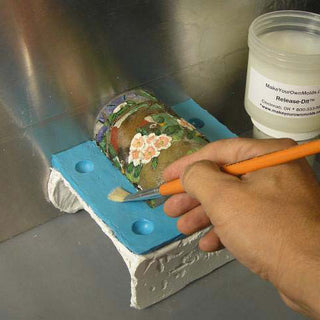
In order to make the first half of a two part mold, one side of the model is embedded in Safe-D Clay™ to the parting line. This is called a clay bed. The remaining exposed side of the model will be the first to receive Silicone Plastique®. Notice that the parting line determines the placement of the clay bed which extends outward away from the parting line by at least an inch. This is called a clay flange. Click Here for our “How to Make a Clay Bed” Tutorial to see an excellent step by step tutorial which covers how to make a proper clay bed in detail.
Step 3
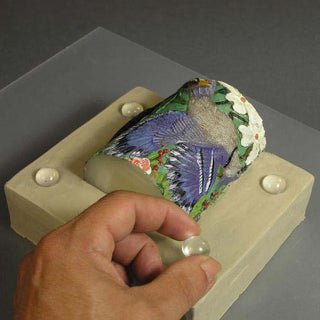
Alignment keys ensure that a mold comes together the way it was intended to. When this mold is finished, the alignment keys ensure that the two mold halves will join together perfectly. To make good alignment keys, they should be incorporated onto the clay flange. For our mold, four alignment keys in the corners of the clay bed are created by embedding ½” marbles.
Step 4
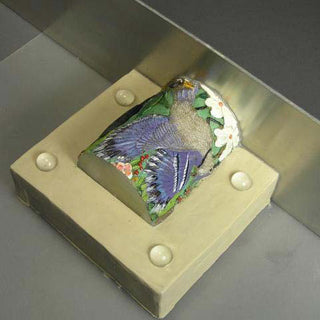
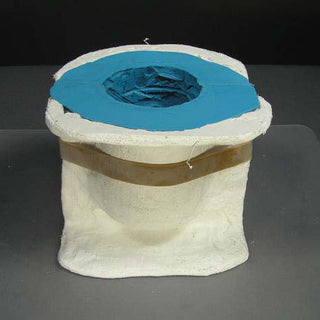
In this project, the clay flange surrounds only three sides of the model. A retaining wall will be mounted to the fourth side in order to create the opening to the mold. The retaining wall is attached by first applying Mold-Dit™ to the exposed side of the model and edge of the clay bed. One side of an Adjust-A-Mold™ is pressed against the fourth side flush with the bottom of the model and the clay bed. Click Here for Mold-Dit™ Basics.
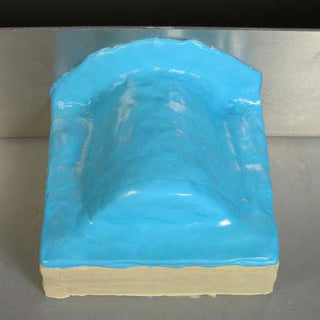
Step 5
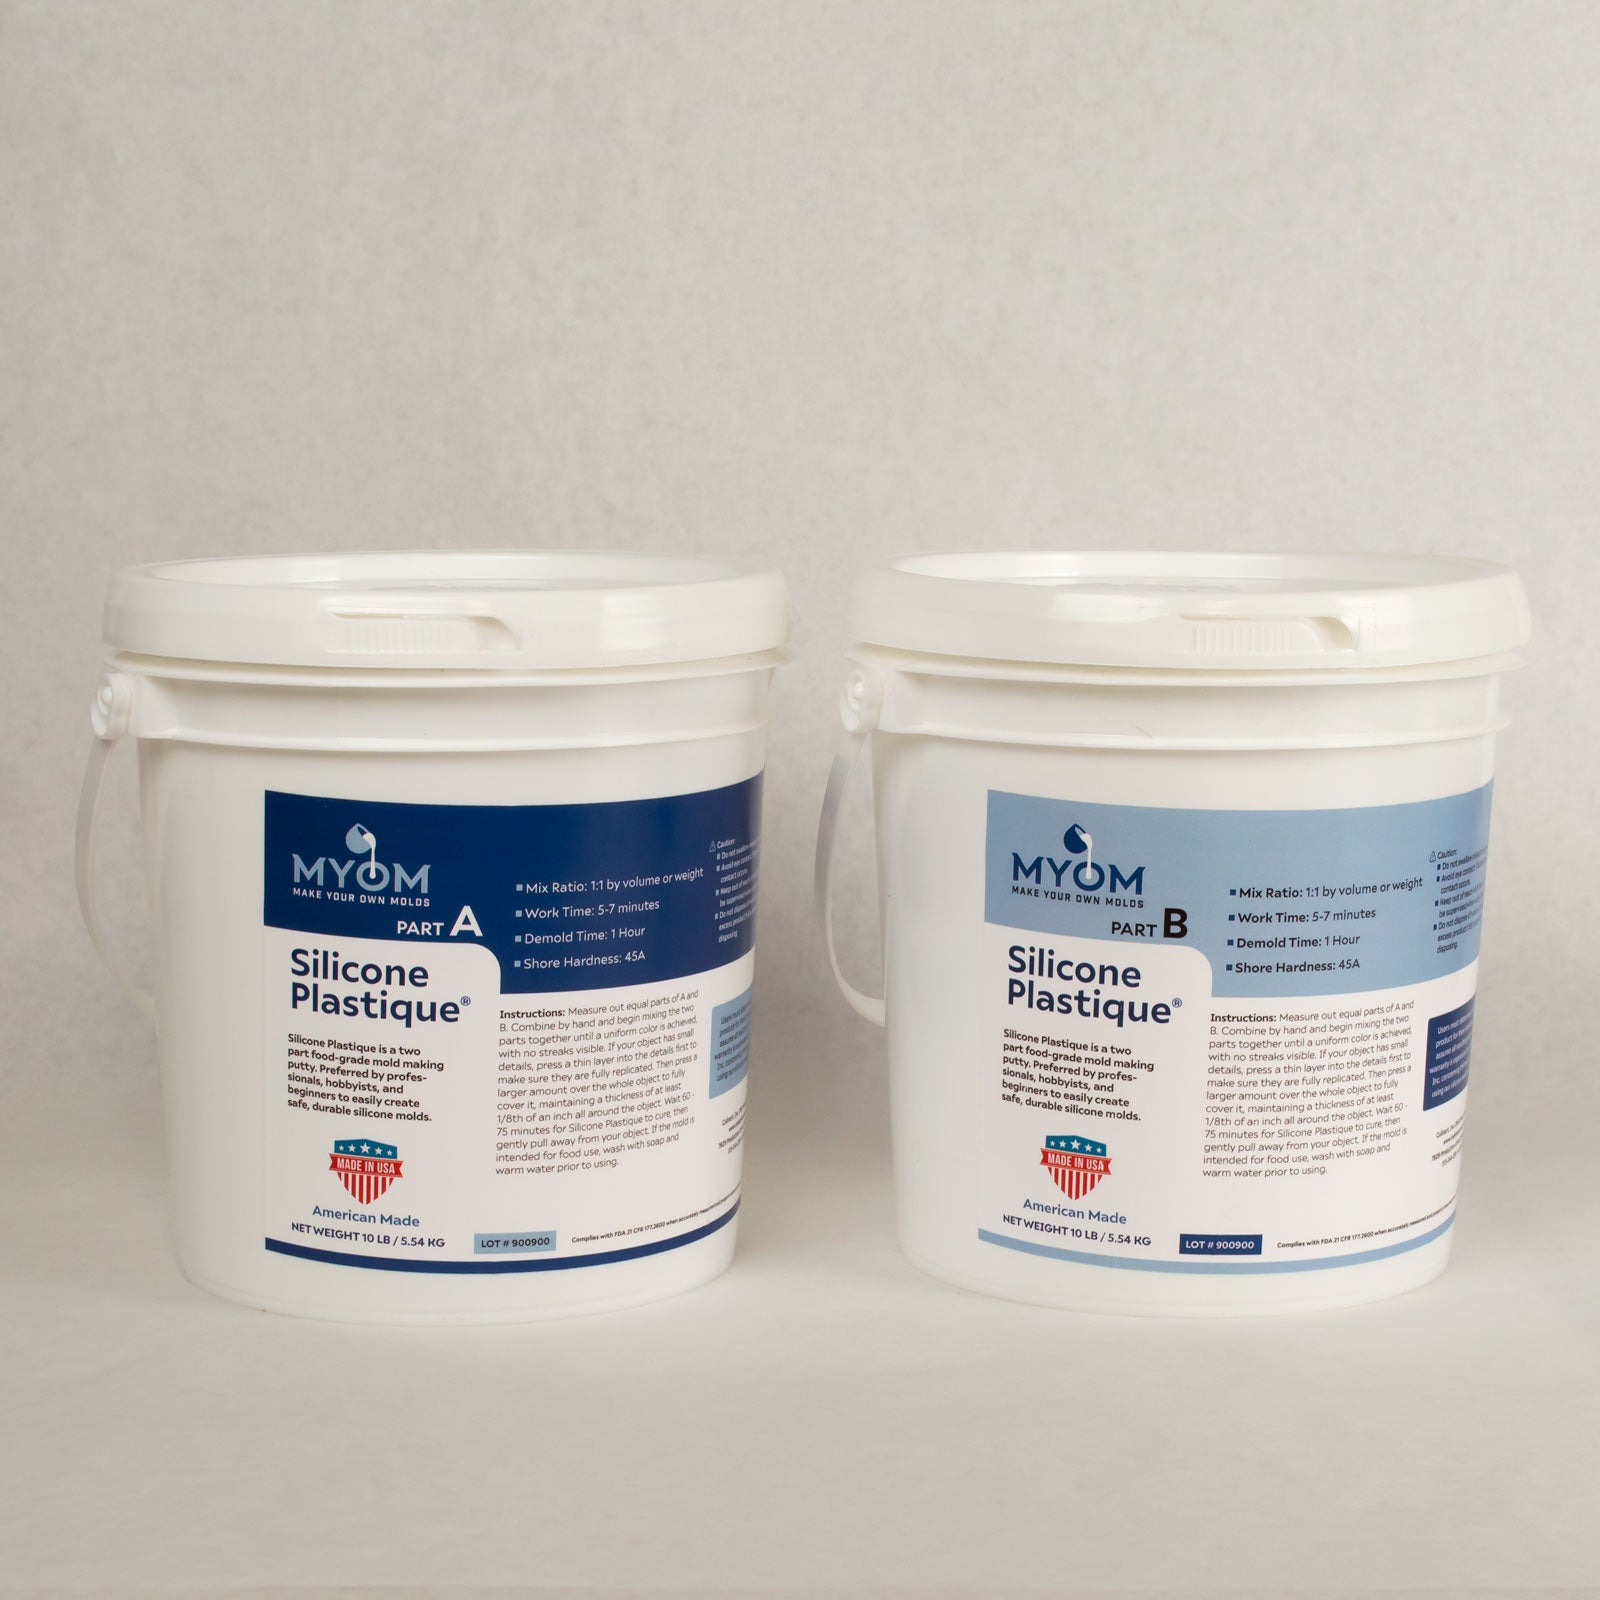
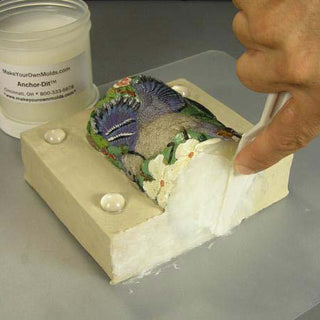
Apply Silicone Plastique® to the top side of the clay bed and the exposed side of the model. Click here to Learn Silicone Plastique® Basics.
Important: Notice how Silicone Plastique® was also applied onto the retaining wall. This will form a rubber flange around the opening of the mold which is highly recommended. Tip: When covering a large area with Silicone Plastique®, it is not necessary to mix the entire amount needed all at once. Sometimes it is better to mix 1/2 or 1/3 the amount needed and mix more to finish. This ensures that you are always working with the most uncured product with the best consistency for good application.
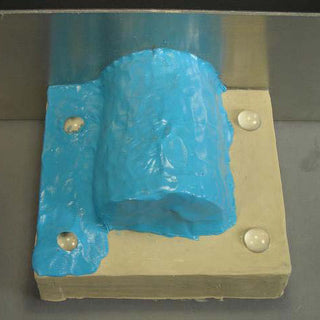
Step 6
Using more Mold-Dit™, attach a second retaining wall on the opposite side from the first.
The purpose of this second wall will be made clear in the next steps.
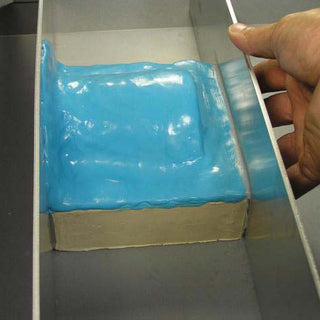
Step 7
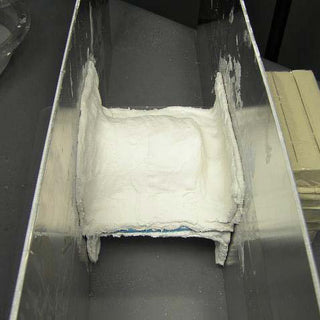
Once the Silicone Plastique® has cured (60-75 minutes) a pre-measured amount of plaster cloth is wetted, then applied over the cured rubber and up the sides of both retaining walls. Applying plaster cloth up the sides of the retaining walls creates a 90 degree bend in the support shell that will serve as a foot on both the top and the bottom of the mold. Trim any excess to create straight edges.
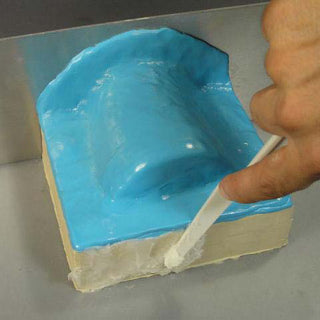
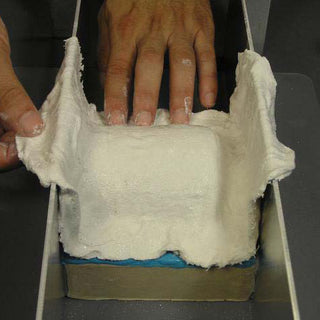
Step 8
After about thirty minutes our plaster cloth has become quite firm. Remove the retaining walls and turn the whole mold assembly up side down onto the support shell. This gives full access to the clay bed which needs to be removed to expose the second side of the model for mold making. Remove the alignment keys and notice the indentations left in the Silicone Plastique®.
Tip: Applying a thin coat of Mold-Dit™ to the model before building the clay bed acts as a parting agent between the model and the clay, making removal much easier.
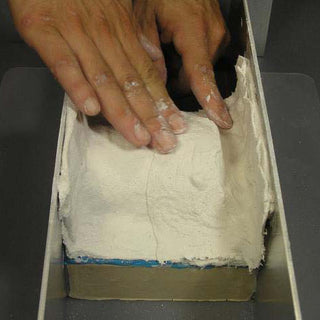
Step 9
Once the clay bed has been removed along with any remnants of clay on the model, the second side of the model is ready for the application of Silicone Plastique®. Before applying, it is critical to apply Mold-Dit™ on all three sides of the silicone rubber flange surrounding the model. Silicone Plastique® bonds to itself and the Mold-Dit™ acts as an effective parting agent preventing one side from sticking to another.

Step 10
Making side two of this mold is simply a repetition of the steps performed in making side one.
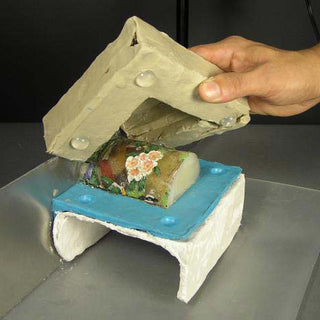
Step 11
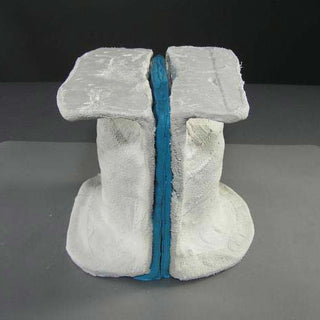
Once the second support shell made from plaster cloth is firm (about 30 minutes), remove the retaining walls and stand the finished mold, open side down. It is easy to remove the support shells and peel the Silicone Plastique® away from the model. Start peeling the silicone by running your finger between the flanges first and slowly peeling each side back and away from the model.
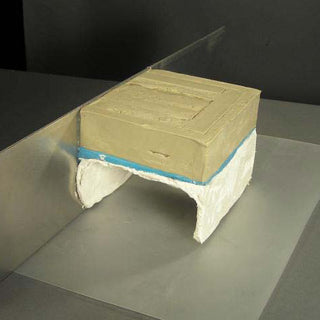
Step 12
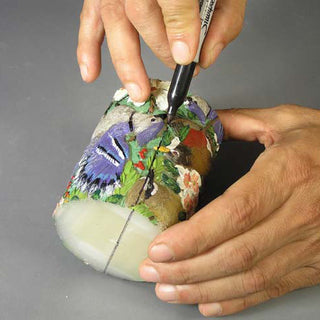
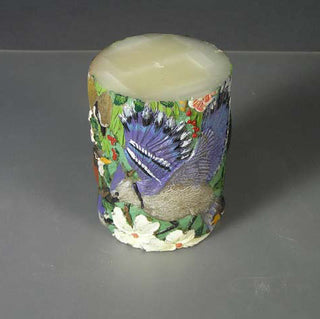
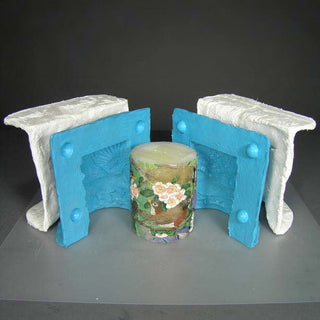
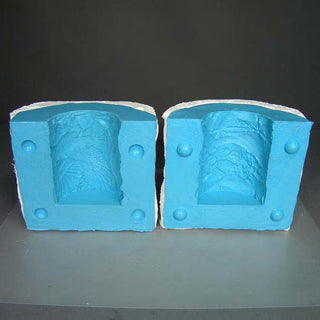
The Mold is Ready – You have just learned how to make a two part mold. In these pictures you can see the silicone flanges with very nice alignment keys which ensure a good fit. When this mold is empty and reassembled, it can be clamped tightly creating compression between the two rubber flanges. This gives you an excellent seal and almost eliminates the existence of a seam line on the object being molded. Also notice the opening of the mold and the nice rubber flange that surrounds it. Applying Silicone Plastique® to the retaining wall created this flange which strengthens the mold opening and provides a clean, rubber coating over the plaster foot. Each rubber side fits snugly into its corresponding support shell while the shape of the support shell enables this mold to be self standing whenever it is being filled or emptied.