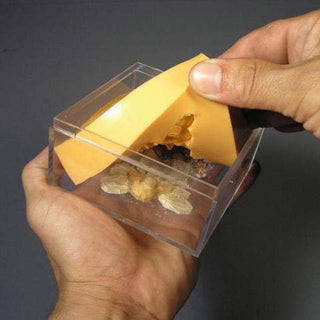
The different methods of mold making can range from very simple molds to extremely complex endeavors involving many parts which must align perfectly. If you are new to this rewarding craft, it is always good to start with a project like the one illustrated below. This step by step mold making tutorial teaches all the fundamentals you need to know in order to apply Silicone Spread™ over an object in order to produce a simple mold that can be used to duplicate thousands of everyday objects.
Click the pictures below to enlarge.
Step 1
|
|
Step 2
|
Equal amounts of Part A (yellow) and Part B (white) measured by weight. |
|
Parts A and B should be stirred thoroughly until a uniform color is achieved. The Silicone Spread™ is now ready to use and should remain workable for up to 20 minutes. |
Step 3
|
|
Step 4
|
“Skim” Coat: Apply Silicone Spread™ with a flat, firm brush (boars hair or pig bristle is recommended). Work the silicone paste into your model’s details, coating the entire surface. |
|
Second Coat: Wait about an hour in order to allow the Silicone Spread™ to come to “half” cure or what is called the gel state. It should still feel very sticky but is no longer a paste that sticks to your finger when you lightly touch it. Brush on another, thicker layer of Silicone Spread™ completely covering your model. You may dispense this second coat with a pastry bag, directing the material with your brush. Every additional application of Silicone Spread™ will bond to the preceding layer whether it is fully cured or not. |
Step 5
|
|
Step 6
|
Third Coat: Using a palette knife or spatula, apply a very thick layer of Silicone Spread™ coating the entire model. With this application, you should create a mold with a wall thickness of at least one-quarter inch in thickness. Silicone Spread™ will bond to itself even if previous layers have fully cured. |
|
For a smoother surface on your finished mold, you may lay plastic-wrap over your final layer and smooth it before it cures. Do not remove the plastic wrap until the Silicone Spread™ has fully cured. |
Step 7
|
|
Step 8
|
Silicone Spread™ has a work-time of about 15 – 20 minutes and a cure time of around two hours at room temperature. Allow the Silicone Spread™ time to fully cure before removing your original object. |
|
Excess material (“flash”) around the edges of your mold may be carefully trimmed off with scissors. |
When you order Silicone Spread™, you will receive one half as Part A (catalyst) and the other half as Part B (Base). The price of Silicone Spread™ decreases as the quantity ordered increases as indicated below. |
Pounds |
Price per lb. |
Buy |
|
1 to 4 lbs. |
$25.00 per lb. |
 |
|
5 to 9 lbs. |
$24.00 per lb. |
 |
You Save $1 per lb.
|
10 to 19 lbs. |
$23.00 per lb. |
 |
You Save $2 per lb.
|
20 to 29 lbs. |
$22.00 per lb. |
 |
You Save $3 per lb.
|
30 to 39 lbs. |
$21.00 per lb. |
 |
You Save $4 per lb.
|
40 to 49 lbs. |
$20.00 per lb. |
 |
You Save $5 per lb.
|
50lbs. and over |
$19.00 per lb.
|
 |
You Save $6 per lb.
|